hexo与nexT配置经历

#hexo与nexT配置经历

​ 来回捣鼓了一天,也算小有收获。

​ git,静态网站,node,js,markdown,这些都或多或少重新学习了一下

​ 遇到的问题:由于盲目相信virtualstudio安装上的nodejs,添加了环境变量就拿来直接用。结果最后安装wordcount出毛病才发现装的是那么老的版本 说明弄清环境是多么重要

做过的处理

  1. 动态背景

  2. 增强版权信息

    原创部分:修改post-copyright.swig,在开头增加

1
2
{% if page.nocopyright %}
{% else %}

即默认显示版权信息,仅当文章前有nocopyright= true 声明时才隐藏版权信息

  1. 点击特效 firework love
  2. 底部原框架信息移至关于并增加镜像链接
  3. ​ busuanzi,wordcount侧栏站点统计
  4. 主页文章阴影(看不出来啊。。。)
  5. valine评论插件
  6. 连接文本样式优化
  7. 文章结束标记
  8. 文末#标签图标化
  9. 在右上角或者左上角实现fork me on github(这里
  10. valine.min.js cdn优化
  11. 复制增加版权声明
  12. 底部微信二维码
  13. 文章top排列
  14. 文章密码

愿景:代码块复制(没成功)

笔记

hexo结构

  1. post文章模板/themes/next/layout/_macro/post.swig
  2. 拓展js: 将文件放在\themes\next\source\js\src目录下,并在next\layout\ _layout.swig内的标签前添加引用,还可以用
1
2
3
4
5
{% if 标签名称  %}
<script>
内容
</script>
{% endif %}

的形式添加为可开启功能(需要在_config 内修改)

1. 整站样式

1. 设置主题风格

打开 themes/next/_config.yml 文件,搜索 scheme 关键字,将你需用启用的 scheme 前面注释 # 去除即可。

1
2
3
4
5
6
7
8
9
# ---------------------------------------------------------------
# Scheme Settings
# ---------------------------------------------------------------

# Schemes
#scheme: Muse # 默认 Scheme,这是 NexT 最初的版本,黑白主调,大量留白
#scheme: Mist # Muse 的紧凑版本,整洁有序的单栏外观
scheme: Pisces # 双栏 Scheme,小家碧玉似的清新
#scheme: Gemini # 类似 Pisces

2. 设置菜单项的显示文本和图标

NexT 使用的是 Font Awesome 提供的图标, Font Awesome 提供了 600+ 的图标,可以满足绝大的多数的场景,同时无须担心在 Retina 屏幕下图标模糊的问题。

2.1 设置菜单项的显示中文文本:

打开 themes/next/languages/zh-Hans.yml 文件,搜索 menu 关键字,修改对应中文或者新增。

1
2
3
4
5
6
7
8
9
10
11
12
menu:
home: 首页
archives: 归档
categories: 分类
tags: 标签
about: 关于
search: 搜索
schedule: 日程表
sitemap: 站点地图
commonweal: 公益404
# 新增menu
catalogue: 目录

2.2 设定菜单项的文件目录和对应图标(新版两项合并)

打开 themes/next/_config.yml 文件,搜索 menu_icons 关键字,修改对应图标名称或者新增对应 menu 的图标。

1
2
3
4
5
6
7
8
9
10
11
12
13
14
15
16
17
18
19
20
21
22
23
24
25
26
27
# ---------------------------------------------------------------
# Menu Settings
# ---------------------------------------------------------------

# When running the site in a subdirectory (e.g. domain.tld/blog), remove the leading slash from link value (/archives -> archives).
# Usage: `Key: /link/ || icon`
# Key is the name of menu item. If translate for this menu will find in languages - this translate will be loaded; if not - Key name will be used. Key is case-senstive.
# Value before `||` delimeter is the target link.
# Value after `||` delimeter is the name of FontAwesome icon. If icon (with or without delimeter) is not specified, question icon will be loaded.
menu:
home: / || home
archives: /archives/ || history
categories: /categories/ || list
tags: /tags/ || tags
tools: /categories/工具资源/ || briefcase
about: /about/ || user
#schedule: /schedule/ || calendar
#sitemap: /sitemap.xml || sitemap
#commonweal: /404/ || heartbeat

# Enable/Disable menu icons.
# Icon Mapping:
# Map a menu item to a specific FontAwesome icon name.
# Key is the name of menu item and value is the name of FontAwesome icon. Key is case-senstive.
# When an question mask icon presenting up means that the item has no mapping icon.
menu_icons:
enable: true

除了 homearchives , /后面都需要手动创建这个页面

2.3 创建菜单项对应文件目录(以分类为例)

在终端窗口下,定位到 Hexo 站点目录下。使用 hexo new page 新建一个页面,命名为 categories :

1
2
$ cd your-hexo-site
$ hexo new page categories

编辑刚新建的页面,设置分类

1
2
3
4
5
6
---
title: 分类
date: 2014-12-22 12:39:04
categories: Testing #分类名
type: "categories"
---

3. 新建404界面

在站点根目录下,输入 hexo new page 404 ,默认在 Hexo 站点下/source/404/index.md 打开新建的404界面,在顶部插入一行,写上 permalink: /404 ,这表示指定该页固定链接为 http://"主页"/404.html

4. 本地搜索

在你站点的根目录下

1
$ npm install hexo-generator-searchdb --save

打开 Hexo 站点的 _config.yml,添加配置

1
2
3
4
5
search:
path: search.xml
field: post
format: html
limit: 10000

打开 themes/next/_config.yml ,搜索关键字 local_search ,设置为 true

1
2
3
4
5
6
7
8
9
# Local search
# Dependencies: https://github.com/flashlab/hexo-generator-search
local_search:
enable: true
# if auto, trigger search by changing input
# if manual, trigger search by pressing enter key or search button
trigger: auto
# show top n results per article, show all results by setting to -1
top_n_per_article: 1

5. 设置网站的图标Favicon

EasyIcon中找一张(32*32)的ico图标,或者去别的网站下载或者制作,并将图标名称改为favicon.ico,然后把图标放在/themes/next/source/images里,并且修改主题配置文件:

1
2
# Put your favicon.ico into `hexo-site/source/` directory.
favicon: /favicon.ico

6.修改字体大小

打开\themes\next\source\css\ _variables\base.styl文件,将$font-size-base改成16px,如下所示:

1
$font-size-base            =16px1

1.8. 各版块透明度修改

1. 内容板块透明

博客根目录 themes\next\source\css\_schemes\Pisces\_layout.styl 文件 .content-wrap 标签下 background: white修改为:

1
background: rgba(255,255,255,0.7); //0.7是透明度

2. 菜单栏背景

博客根目录 themes\next\source\css\_schemes\Pisces\_layout.styl 文件 .header-inner 标签下 background: white修改为:

1
background: rgba(255,255,255,0.7); //0.7是透明度

3. 站点概况背景

博客根目录 themes\next\source\css\_schemes\Pisces\_sidebar.styl 文件 .sidebar-inner 标签下 background: white修改为:

1
background: rgba(255,255,255,0.7); //0.7是透明度

然后修改博客根目录 themes\next\source\css\_schemes\Pisces\_layout.styl 文件 .sidebar 标签下 background: $body-bg-color修改为:

1
background: rgba(255,255,255,0.7); //0.7是透明度

4. 按钮背景

博客根目录 themes\next\source\css\_common\components\post\post-button.styl 同上修改对应位置为 background: transparent;

2. 顶部

2.1. 添加顶部加载条

打开 themes/next/_config.yml ,搜索关键字 pace ,设置为 true ,可以更换加载样式:

1
2
3
4
5
6
7
8
9
10
11
12
13
14
15
16
17
18
19
# Progress bar in the top during page loading.
pace: true
# Themes list:
#pace-theme-big-counter
#pace-theme-bounce
#pace-theme-barber-shop
#pace-theme-center-atom
#pace-theme-center-circle
#pace-theme-center-radar
#pace-theme-center-simple
#pace-theme-corner-indicator
#pace-theme-fill-left
#pace-theme-flash
#pace-theme-loading-bar
#pace-theme-mac-osx
#pace-theme-minimal
# For example
# pace_theme: pace-theme-center-simple
pace_theme: pace-theme-flash #替换更换样式

2.2. 网站标题栏背景颜色

当使用Pisces主题时,网站标题栏背景颜色是黑色的,感觉不好看,可以在 source/css/_schemes/Pisces/_brand.styl 中修改:

1
2
3
4
5
6
7
8
9
10
11
12
.site-meta {
padding: 20px 0;
color: white;
background: $blue-dodger; //修改为自己喜欢的颜色

+tablet() {
box-shadow: 0 0 16px rgba(0,0,0,0.5);
}
+mobile() {
box-shadow: 0 0 16px rgba(0,0,0,0.5);
}
}

但是,我们一般不主张这样修改源码的,在 next/source/css/_custom目录下面专门提供了 custom.styl 供我们自定义样式的,因此也可以在 custom.styl 里面添加:

1
2
3
4
// Custom styles.
.site-meta {
background: $blue; //修改为自己喜欢的颜色
}

3. 文章流

3.1 博文置顶

修改站点文件夹下node_modules/hexo-generator-index/lib/generator.js,在生成文章之前进行文章top值排序。

Netcan_Space的解决Hexo置顶问题给出了一种新方案 ,可以避免修改组件的尴尬并便于移植,可用性有待尝试已验证,执行

npm install hexo-generator-index-pin-top --save
1
npm install hexo-generator-index-pin-top --save

文章标注中的top值和sticky值默认为零,需排序就调大top,要置顶图标设sticky(注意sticky不能排序)在文章中,增加top值定义,值越大,文章排序越靠前。示例:

1
2
3
4
5
6
7
8
9
10
title: 为Hexo添加文章置顶功能(三)
categories: Tech
tags: [Hexo,文章置顶]
top: 1
sticky: 1
date: 2016-07-20 11:44:40

## 标题

正文

3.2 主页文章添加边框阴影效果

打开 themes/next/source/css/_custom/custom.styl ,向里面加代码:

1
2
3
4
5
6
7
8
// 主页文章添加阴影效果
.post {
margin-top: 0px;
margin-bottom: 60px;
padding: 25px;
-webkit-box-shadow: 0 0 5px rgba(202, 203, 203, .5);
-moz-box-shadow: 0 0 5px rgba(202, 203, 204, .5);
}

3.3. 修改文章间分割线

打开 themes/next/source/css/_common/components/post/post-eof.styl ,修改:

1
2
3
4
5
6
7
8
9
10
.posts-expand {
.post-eof {
display: block;
// margin: $post-eof-margin-top auto $post-eof-margin-bottom;
width: 0%; //分割线长度
height: 0px; // 分割线高度
background: $grey-light;
text-align: center;
}
}

3.4. 文章加密访问

img

打开themes->next->layout->_partials->head.swig文件,在以下位置插入这样一段代码:

img

代码如下:

1
2
3
4
5
6
7
8
9
10
<script>
(function(){
if('{{ page.password }}'){
if (prompt('请输入文章密码') !== '{{ page.password }}'){
alert('密码错误!');
history.back();
}
}
})();
</script>

然后在文章上写成类似这样:

img

4. 文章内

4.1文章顶部显示更新时间

打开主题配置文件 _config.yml ,搜索关键字 updated_at 设置为 true

1
2
3
4
5
6
# Post meta display settings
post_meta:
item_text: true
created_at: true
updated_at: ture
categories: true

编辑文章,增加关键字updated(next可以根据文章改变时间自动更改)

1
2
3
4
5
---
layout: layout
title: 关于
date: 2017-08-18 15:41:18
updated: 2017-09-05 20:18:54 #手动添加更新时间

4.1 实现顶部统计功能

img

在根目录下安装 hexo-wordcount,运行:

1
$ npm install hexo-wordcount --save1

然后在主题的配置文件中,配置如下:

1
2
3
4
5
6
# Post wordcount display settings
# Dependencies: https://github.com/willin/hexo-wordcount
post_wordcount:
item_text: true
wordcount: true
min2read: true123456

4.2代码块优化

4.2.1代码块自定义样式

img

打开\themes\next\source\css\_custom\custom.styl,向里面加入:(颜色可以自己定义)

1
2
3
4
5
6
7
8
9
10
11
12
13
14
15
// Custom styles.
code {
color: #ff7600;
background: #fbf7f8;
margin: 2px;
}
// 大代码块的自定义样式
.highlight, pre {
margin: 5px 0;
padding: 5px;
border-radius: 3px;
}
.highlight, code, pre {
border: 1px solid #d6d6d6;
}
  • 行内代码
    在主题目录下,将source/css/_custom/custom.styl文件修改如下:

    1
    2
    3
    4
    5
    6
    7
    8
    9
    //行内代码样式
    code {
    color: #c7254e;
    background: #f9f2f4;
    border: 1px solid #d6d6d6;
    padding:1px 4px;
    word-break: break-all;
    border-radius:4px;
    }
  • 区块代码
    在主题目录下,修改config.yml文件:

    1
    2
    #   样式可选: normal | night | night eighties | night blue | night bright
    highlight_theme: night
22. 给代码块添加复制功能!!!(没成功,研究中)
  • 下载插件clipboard.js
  • 打开 themes/next/source/lib/ ,新建文件夹 clipboard
  • 把下载 clipboard.js下的 src 文件夹下的文件拖动到 clipboard文件夹下。
  • 打开 themes/next/source/js/src/ ,新建文件 custom.js ,代码如下:
1
2
3
4
5
6
7
8
9
10
11
12
13
14
15
16
17
18
19
20
21
22
23
24
25
26
27
28
29
30
31
32
33
34
35
36
37
38
39
40
41
42
43
44
45
46
47
48
49
50
51
52
53
54
55
56
57
58
59
60
61
62
63
64
65
66
67
68
69
70
71
72
73
74
75
76
77
78
79
80
81
82
83
84
85
86
87
88
89
90
91
92
93
94
95
96
97
98
99
100
101
102
//此函数用于创建复制按钮
function createCopyBtns() {
var $codeArea = $("figure table");
//查看页面是否具有代码区域,没有代码块则不创建 复制按钮
if ($codeArea.length > 0) {
//复制成功后将要干的事情
function changeToSuccess(item) {
$imgOK = $("#copyBtn").find("#imgSuccess");
if ($imgOK.css("display") == "none") {
$imgOK.css({
opacity: 0,
display: "block"
});
$imgOK.animate({
opacity: 1
}, 1000);
setTimeout(function() {
$imgOK.animate({
opacity: 0
}, 2000);
}, 2000);
setTimeout(function() {
$imgOK.css("display", "none");
}, 4000);
};
};
//创建 全局复制按钮,仅有一组。包含:复制按钮,复制成功响应按钮
//值得注意的是:1.按钮默认隐藏,2.位置使用绝对位置 position: absolute; (position: fixed 也可以,需要修改代码)
$(".post-body").before('<div id="copyBtn" style="opacity: 0; position: absolute;top:0px;display: none;line-height: 1; font-size:1.5em"><span id="imgCopy" ><i class="fa fa-paste fa-fw"></i></span><span id="imgSuccess" style="display: none;"><i class="fa fa-check-circle fa-fw" aria-hidden="true"></i></span>');
//创建 复制 插件,绑定单机时间到 指定元素,支持JQuery
var clipboard = new Clipboard('#copyBtn', {
target: function() {
//返回需要复制的元素内容
return document.querySelector("[copyFlag]");
},
isSupported: function() {
//支持复制内容
return document.querySelector("[copyFlag]");
}
});
//复制成功事件绑定
clipboard.on('success',
function(e) {
//清除内容被选择状态
e.clearSelection();
changeToSuccess(e);
});
//复制失败绑定事件
clipboard.on('error',
function(e) {
console.error('Action:', e.action);
console.error('Trigger:', e.trigger);
});
//鼠标 在复制按钮上滑动和离开后渐变显示/隐藏效果
$("#copyBtn").hover(
function() {
$(this).stop();
$(this).css("opacity", 1);
},
function() {
$(this).animate({
opacity: 0
}, 2000);
}
);
}
}
//感应鼠标是否在代码区
$("figure").hover(
function() {
//-------鼠标活动在代码块内
//移除之前含有复制标志代码块的 copyFlag
$("[copyFlag]").removeAttr("copyFlag");
//在新的(当前鼠标所在代码区)代码块插入标志:copyFlag
$(this).find(".code").attr("copyFlag", 1);
//获取复制按钮
$copyBtn = $("#copyBtn");
if ($copyBtn.lenght != 0) {
//获取到按钮的前提下进行一下操作
//停止按钮动画效果
//设置为 显示状态
//修改 复制按钮 位置到 当前代码块开始部位
//设置代码块 左侧位置
$copyBtn.stop();
$copyBtn.css("opacity", 0.8);
$copyBtn.css("display", "block");
$copyBtn.css("top", parseInt($copyBtn.css("top")) + $(this).offset().top - $copyBtn.offset().top + 3);
$copyBtn.css("left", -$copyBtn.width() - 3);
}
},
function() {
//-------鼠标离开代码块
//设置复制按钮可见度 2秒内到 0
$("#copyBtn").animate({
opacity: 0
}, 2000);
}
);
//页面载入完成后,创建复制按钮
$(document).ready(function() {
createCopyBtns();
});
  • 打开 themes/next/layout/_custom/ ,新建文件 custom.swig ,代码如下:
1
2
<script type="text/javascript" src="/lib/clipboard/clipboard.js"></script>
<script type="text/javascript" src="/js/src/custom.js"></script>
  • 修改文件 themes/next/layout/_layout.swig ,在标签 </body>上面插入代码:
1
{% include '_custom/custom.swig' %}

4.3 修改文章内链接文本样式

img

修改文件 themes\next\source\css\_common\components\post\post.styl,在末尾添加如下css样式,:

1
2
3
4
5
6
7
8
9
10
11
// 文章内链接文本样式
.post-body p a{
color: #0593d3;
border-bottom: none;
border-bottom: 1px solid #0593d3;
&:hover {
color: #fc6423;
border-bottom: none;
border-bottom: 1px solid #fc6423;
}
}1234567891011

其中选择.post-body 是为了不影响标题,选择 p 是为了不影响首页“阅读全文”的显示样式,颜色可以自己定义。

4.4 在每篇文章末尾统一添加“本文结束”标记

img

在路径 \themes\next\layout\_macro 中新建 passage-end-tag.swig 文件,并添加以下内容:

1
2
3
4
5
<div>
{% if not is_index %}
<div style="text-align:center;color: #ccc;font-size:14px;">-------------本文结束<i class="fa fa-paw"></i>感谢您的阅读-------------</div>
{% endif %}
</div>

接着打开\themes\next\layout\_macro\post.swig文件,在post-body 之后, post-footer 之前添加如下画红色部分代码(post-footer之前两个DIV):

img

代码如下:

1
2
3
4
5
<div>
{% if not is_index %}
{% include 'passage-end-tag.swig' %}
{% endif %}
</div>

然后打开主题配置文件(_config.yml),在末尾添加:

1
2
3
# 文章末尾添加“本文结束”标记
passage_end_tag:
enabled: true

完成以上设置之后,在每篇文章之后都会添加如上效果图的样子。

4.5增强文章底部版权信息并默认开启

  • 增加文章标题、发布时间、更新时间等信息

  • 原创部分

    默认显示版权信息,仅当文章md文件的头部信息中添加nocopyright: true时,隐藏版权声明

在目录next/layout/_macro/下找到post-copyright.swig,进行部分修改:

1
2
3
4
5
6
7
8
9
10
11
12
13
14
15
16
17
18
19
20
21
22
23
24
25
26
27
28
29
{% if page.nocopyright %}
{% else %}
<ul class="post-copyright">
<li class="post-copyright-author">
<strong>本文标题:</strong>
<a href="{{ url_for(page.path) }}">{{ page.title }}</a>
</li>
<li class="post-copyright-author">
<strong>{{ __('post.copyright.author') + __('symbol.colon') }}</strong>
{{ config.author }}
</li>
<li class="post-copyright-author">
<strong>发布时间:</strong>
{{ page.date.format("YYYY年MM月DD日 - HH:MM") }}
</li>
<li class="post-copyright-author">
<strong>最后更新:</strong>
{{ page.updated.format("YYYY年MM月DD日 - HH:MM") }}
</li>
<li class="post-copyright-link">
<strong>{{ __('post.copyright.link') + __('symbol.colon') }}</strong>
<a href="{{ post.permalink }}" title="{{ post.title }}">{{ post.permalink }}</a>
</li>
<li class="post-copyright-license">
<strong>{{ __('post.copyright.license_title') + __('symbol.colon') }} </strong>
{{ __('post.copyright.license_content', theme.post_copyright.license_url, theme.post_copyright.license) }}
</li>
</ul>
{% endif %}

如果要在特定博文下取消版权信息的显示,需要在 Markdown 中增加nocopyright: true的设置,类似:

1
2
3
4
5
6
7
---
title: 小项目
date: 2018-01-01 22:53:53
tags: blogs
categories: blogs
nocopyright: true
---

>

(注意:如果解析出来之后,你的原始链接有问题,变成如:http://yoursite.com/小项目.html,在根目录下_config.yml中补充url信息就行了。
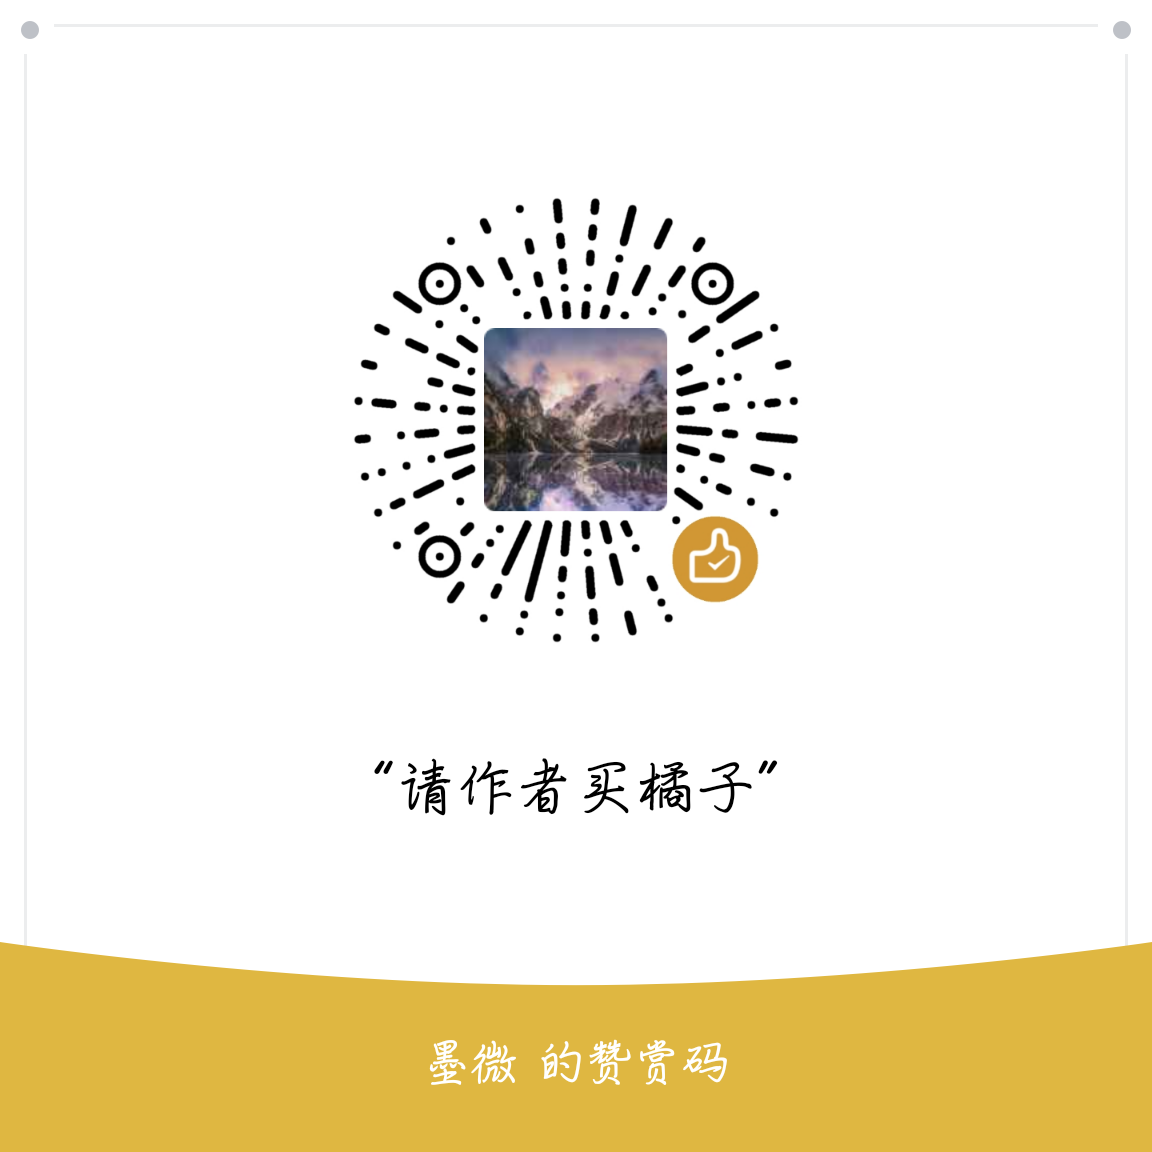
4.6 打赏

  • 修改文字与图片
1
2
3
4
5
# 打赏设置
reward_comment: 坚持原创技术分享,您的支持将鼓励我继续创作!
wechatpay: /assets/img/weixin.jpg
alipay: /assets/img/alipay.jpg
# bitcoin: /images/bitcoin.png

文字、图片位置可自行修改

  • 字体不闪动设置

修改文件next/source/css/_common/components/post/post-reward.styl,然后注释其中的函数wechat:hoveralipay:hover,如下:

1
2
3
4
5
6
7
8
9
10
11
12
/* 注释文字闪动函数
#wechat:hover p{
animation: roll 0.1s infinite linear;
-webkit-animation: roll 0.1s infinite linear;
-moz-animation: roll 0.1s infinite linear;
}
#alipay:hover p{
animation: roll 0.1s infinite linear;
-webkit-animation: roll 0.1s infinite linear;
-moz-animation: roll 0.1s infinite linear;
}
*/

4.7. 修改文章底部的那个带#号的标签

打开 themes/next/layout/_macro/post.swig 文件,搜索 rel="tag"># ,将 # 换成 <i class="fa fa-tag"></i>

1
2
3
4
5
<div class="post-tags">
{% for tag in post.tags %}
<a href="{{ url_for(tag.path) }}" rel="tag"><i class="fa fa-tag"></i> {{ tag.name }}</a>
{% endfor %}
</div>

4.8 禁用hexo特定博客的评论功能:

只要在markdown的题头加入

commens: false

即可。

如,你的原文可能如下:

title: 标题
date: 2014-11-06 20:46:29
---   
正文

​ 改成如下的格式即可:

title: 标题
date: 2014-11-06 20:46:29
comments: false
---
正文

5. 侧边栏设置

5.1 设置侧边栏社交链接

打开 themes/next/_config.yml 文件,搜索关键字 social ,然后添加社交站点名称与地址即可。

1
2
3
4
5
6
7
8
9
10
11
12
13
14
15
# ---------------------------------------------------------------
# Sidebar Settings
# ---------------------------------------------------------------

# Social Links.
# Usage: `Key: permalink || icon`
# Key is the link label showing to end users.
# Value before `||` delimeter is the target permalink.
# Value after `||` delimeter is the name of FontAwesome icon. If icon (with or without delimeter) is not specified, globe icon will be loaded.
social:
E-Mail: mailto:yourname@gmail.com || envelope
Google: https://plus.google.com/yourname || google
Twitter: https://twitter.com/yourname || twitter
FB Page: https://www.facebook.com/yourname || facebook
# 等等

5.2 设置侧边栏社交图标

打开 themes/next/_config.yml 文件,搜索关键字 social_icons ,添加社交站点名称(注意大小写)图标,Font Awesome图标地。

img

打开主题配置文件(_config.yml),搜索social_icons:,在图标库找自己喜欢的小图标,并将名字复制在如下位置

img

5.3. 头像设置

5.3.1 添加头像

打开 themes/next/_config.yml 文件,搜索 Sidebar Avatar 关键字,去掉 avatar 前面的#

1
2
3
4
# Sidebar Avatar
# in theme directory(source/images): /images/avatar.jpg
# in site directory(source/uploads): /uploads/avatar.jpg
avatar: http://example.com/avatar.png

或者使用本地图片,把图片放入 themes/next/source/images 下,修改 avatar

1
avatar: /images/avatar.gif
5.3.2 设置头像边框为圆形框

打开位于 themes/next/source/css/_common/components/sidebar/sidebar-author.syl 文件,修改如下:

1
2
3
4
5
6
7
8
9
10
11
12
.site-author-image {
display: block;
margin: 0 auto;
padding: $site-author-image-padding;
max-width: $site-author-image-width;
height: $site-author-image-height;
border: $site-author-image-border-width solid $site-author-image-border-color;
// 修改头像边框
border-radius: 50%;
-webkit-border-radius: 50%;
-moz-border-radius: 50%;
}
5.3.3特效:鼠标放置头像上旋转
1
2
3
4
5
6
7
8
9
10
11
12
13
14
15
16
17
18
19
20
21
.site-author-image {
display: block;
margin: 0 auto;
padding: $site-author-image-padding;
max-width: $site-author-image-width;
height: $site-author-image-height;
border: $site-author-image-border-width solid $site-author-image-border-color;
// 修改头像边框
border-radius: 50%;
-webkit-border-radius: 50%;
-moz-border-radius: 50%;
// 设置旋转
transition: 1.4s all;
}
// 可旋转的圆形头像,`hover`动作
.site-author-image:hover {
-webkit-transform: rotate(360deg);
-moz-transform: rotate(360deg);
-ms-transform: rotate(360deg);
-transform: rotate(360deg);
}
5.3.4 浏览页面的时候显示当前浏览进度

打开 themes/next/_config.yml ,搜索关键字 scrollpercent ,把 false 改为 true

1
2
# Scroll percent label in b2t button
scrollpercent: true

推荐 如果想把 top按钮放在侧边栏,打开 themes/next/_config.yml ,搜索关键字 b2t ,把 false 改为 true

1
2
3
4
5
# Back to top in sidebar
b2t: true

# Scroll percent label in b2t button
scrollpercent: true

5.4 友情链接

打开 themes/next/_config.yml 文件,搜索关键字 Blog rolls

1
2
3
4
5
6
7
# Blog rolls
links_title: 友情链接 #标题
links_layout: block #布局,一行一个连接
#links_layout: inline
links: #连接
baidu: http://example.com/
google: http://example.com/

5.5 RSS

img

在你 Hexo 站点目录下:

1
$ npm install hexo-generator-feed --save

打开 Hexo 站点下的 _config.yml ,添加如下配置:

1
2
3
4
5
6
7
8
# feed
# Dependencies: https://github.com/hexojs/hexo-generator-feed
feed:
type: atom
path: atom.xml
limit: 20
hub:
content:

在里面的末尾添加:(请注意在冒号后面要加一个空格,不然会发生错误!)

1
2
3
# Extensions
## Plugins: http://hexo.io/plugins/
plugins: hexo-generate-feed

然后打开next主题文件夹里面的_config.yml,在里面配置为如下样子:(就是在rss:的后面加上/atom.xml,注意在冒号后面要加一个空格)

1
2
3
4
# Set rss to false to disable feed link.
# Leave rss as empty to use site's feed link.
# Set rss to specific value if you have burned your feed already.
rss: /atom.xml

配置完之后运行:

1
$ hexo g

重新生成一次,你会在./public 文件夹中看到 atom.xml 文件。然后启动服务器查看是否有效,之后再部署到 Github 中。

5.6词云

其实就是标签做的,放在侧边栏上。需要安装插件。

1
npm install hexo-tag-cloud --save

接着在next/layout/_macro/sidebar.swig添加如下内容。

1
2
3
4
5
6
7
8
9
10
11
12
{% if site.tags.length > 1 %}
<script type="text/javascript" charset="utf-8" src="/js/tagcloud.js"></script>
<script type="text/javascript" charset="utf-8" src="/js/tagcanvas.js"></script>
<div class="widget-wrap">
//标题栏还是省略了好看<h3 class="widget-title">Tag Cloud</h3>
<div id="myCanvasContainer" class="widget tagcloud">
<canvas width="250" height="250" id="resCanvas" style="width=100%">
{{ list_tags() }}
</canvas>
</div>
</div>
{% endif %}

5.7 运行时间

在next/layout/_custom/sidebar.swig文件中先添加。

1
2
3
4
5
6
7
8
9
10
11
12
13
14
15
16
17
18
19
20
21
22
23
24
25
26
27
<div id="days"></div>
</script>
<script language="javascript">
function show_date_time(){
window.setTimeout("show_date_time()", 1000);
BirthDay=new Date("05/27/2017 15:00:00");
today=new Date();
timeold=(today.getTime()-BirthDay.getTime());
sectimeold=timeold/1000
secondsold=Math.floor(sectimeold);
msPerDay=24*60*60*1000
e_daysold=timeold/msPerDay
daysold=Math.floor(e_daysold);
e_hrsold=(e_daysold-daysold)*24;
hrsold=setzero(Math.floor(e_hrsold));
e_minsold=(e_hrsold-hrsold)*60;
minsold=setzero(Math.floor((e_hrsold-hrsold)*60));
seconds=setzero(Math.floor((e_minsold-minsold)*60));
document.getElementById('days').innerHTML="已运行"+daysold+"天"+hrsold+"时"+minsold+"分"+seconds+"秒";
}
function setzero(i){
if (i<10)
{i="0" + i};
return i;
}
show_date_time();
</script>

接着在next/layout/_macro/sidebar.swig文件中修改。

1
2
3
4
5
6
7
8
9
10
11
12
13
14
15
16
17
18
{# Blogroll #}
{% if theme.links %}
<div class="links-of-blogroll motion-element {{ "links-of-blogroll-" + theme.links_layout | default('inline') }}">
<div class="links-of-blogroll-title">
<i class="fa fa-fw fa-{{ theme.links_icon | default('globe') | lower }}"></i>
{{ theme.links_title }}&nbsp;
<i class="fa fa-fw fa-{{ theme.links_icon | default('globe') | lower }}"></i>
</div>
<ul class="links-of-blogroll-list">
{% for name, link in theme.links %}
<li class="links-of-blogroll-item">
<a href="{{ link }}" title="{{ name }}" target="_blank">{{ name }}</a>
</li>
{% endfor %}
</ul>
{% include '../_custom/sidebar.swig' %}
</div>
{% endif %}

觉得需要调整颜色的还可以在/next/source/css/_custom/custom.styl加入如下的语句。

1
2
3
4
5
6
7
// 自定义的侧栏时间样式
#days {
display: block;
color: rgb(7, 179, 155);
font-size: 13px;
margin-top: 15px;
}

img

5.8 添加网易云音乐

在网易云音乐(网页版)中搜索我们想要插入的音乐,然后点击生成外链播放器

img

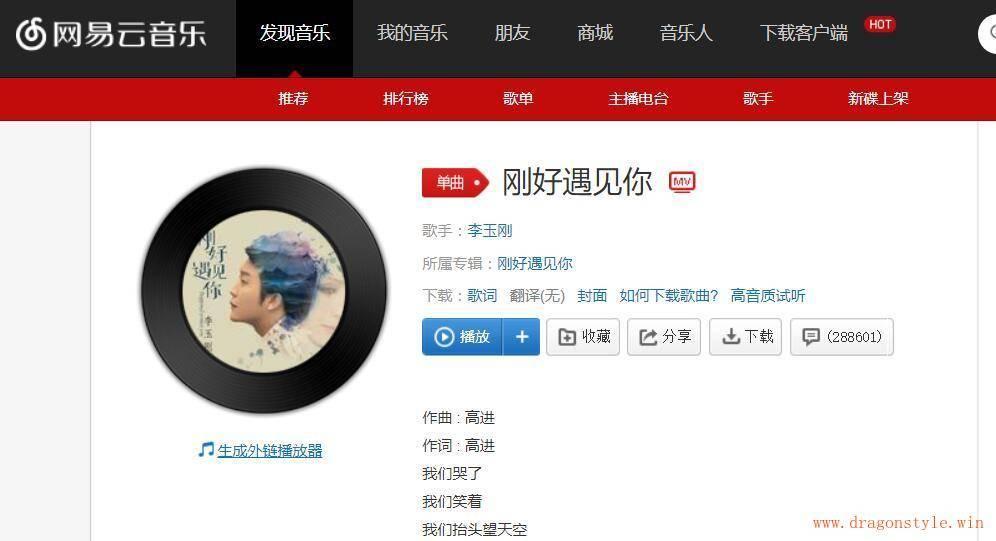
然后根据你得设置生成相应的html代码,将获得的html代码插入到你想要插入的位置。

themes/next/layout/_custom/sidebar.swig 文件中增加生成的HTML代码:

1
2
3
4
<div id="music163player">
<iframe frameborder="no" border="0" marginwidth="0" marginheight="0" width=280 height=86 src="//music.163.com/outchain/player?type=2&id=38358214&auto=0&height=66">
</iframe>
</div>

可以根据自己实际情况修改宽高等样式。

5.9 侧边栏添加访问量等信息

  • 获取不蒜子代码

不蒜子上获取代码:

1
<script async src="//dn-lbstatics.qbox.me/busuanzi/2.3/busuanzi.pure.mini.js"></script>
  • 添加js文件

在主题目录下,找到\layout\_layout.swing文件, 在文件的后面, </body>标签之前,添加上面代码。

  • 安装wordcount
1
npm install hexo-wordcount --save
  • 修改布局

在主题目录下,找到\layout\_macro\sidebar.swing文件,查找/nav,在</nav>标签之前,添加下面代码:

1
2
3
4
5
6
7
8
9
10
11
12
13
14
<br>
<br>
<div class="site-state-item site-state-posts" style="border-left:none;">
<span class="site-state-item-count" id="busuanzi_value_site_pv"></span>
<span class="site-state-item-name">浏览量</span>
</div>
<div class="site-state-item site-state-posts">
<span class="site-state-item-count" id="busuanzi_value_site_uv"></span>
<span class="site-state-item-name">访客量</span>
</div>
<div class="site-state-item site-state-posts">
<span class="site-state-item-count">{{totalcount(site)}}</span>
<span class="site-state-item-name">总字数</span>
</div>

6. 底部

6.1. 页脚加上微信二维码

主题默认的微信订阅个人感觉不美观,看到很多网站都是在页脚有个微信的 Logo,然后鼠标移动到上面便会显示二维码,这样感觉很棒。

首先编辑文件,在文件最后加上下面代码:

1
2
3
4
5
6
7
8
文件位置:~/blog/themes/next/layout/_partials/footer.swig
<div class="weixin-box">
<div class="weixin-menu">
<div class="weixin-hover">
<div class="weixin-description">微信扫一扫,订阅本博客</div>
</div>
</div>
</div>

再在/images文件夹放入wechat.svg,wechatlogo.svg(下文有说明)

然后编辑custom.styl,加入:

1
2
3
4
5
6
7
8
9
10
11
12
13
14
15
16
17
18
19
20
21
22
23
24
25
26
27
28
29
30
31
32
33
34
35
36
37
38
39
40
41
42
43
44
45
46
47
48
49
50
51
52
文件位置:~/blog/themes/next/source/css/_custom/custom.styl
// 自定义的页脚微信样式
.weixin-box {
position: absolute;
bottom: 43px;
left: 10px;
border-radius: 5px;
box-shadow: 0px 0px 10px 0px rgba(0, 0, 0, 0.35);
}
.weixin-menu {
position: relative;
height: 24px;
width: 24px;
cursor: pointer;
background: url(/images/wechatlogo.svg);
background-size: 24px 24px;
}
.weixin-hover {
position: absolute;
bottom: 0px;
left: 0px;
height: 0px;
width: 0px;
border-radius: 3px;
box-shadow: 0px 0px 10px 0px rgba(0, 0, 0, 0.35);
background: url(/images/wechat.svg);
background-color: #fff;
background-repeat: no-repeat;
background-size: 150px 150px;
transition: all 0.35s ease-in-out;
z-index: 1024;
opacity: 0;
}
.weixin-menu:hover .weixin-hover {
bottom: 24px;
left: 24px;
height: 170px;
width: 150px;
opacity: 1;
}
.weixin-description {
opacity: 0;
position: absolute;
bottom: 3%;
left: 5%;
right: 5%;
font-size: 12px;
transition: all 0.35s cubic-bezier(1, 0, 0, 1);
}
.weixin-menu:hover .weixin-description {
opacity: 1;
}

图片务必用矢量图 svg 格式,否则手机上显示效果很差,其它的自己看情况更改。

微信 Logo 的图片我准备好了,点击下载** wechat.svg (1.6 KB) 。二维码怎么弄成 svg 格式呢,安利个 网站 ,下载 svg 格式的就行。

我参考了 这个 代码,欢迎 扫一扫 打赏我的博客哦grin

6.5. 隐藏网页底部powered By Hexo / 强力驱动并自定义

在主题配置文件_config.yml中修改:

1
copyright: false
  • 添加文字或者链接

在主题目录下的layout/_partials/footer,查找powered-by

1
2
3
4
{% if theme.copyright %}
<div class="powered-by">{#
#}{{ __('footer.powered', '<a class="theme-link" href="https://hexo.io">Hexo</a>') }}{#
#}</div>

在上面代码之前添加你的文字,或者增加链接:

1
2
<p>best for best!</p>    <!--文字-->
<a href="www.baidu.com">百度</a> <!--链接-->

至于样式,这里不多介绍。需要了解html、css知识。

6.6.让页脚的心跳动起来

更新 NexT 主题后,发现默认的icon变成了** (user),所以首先要还原为heart

首先编辑主题配置文件:

1
2
3
4
文件位置:~/blog/themes/next/_config.yml
footer:
- icon: user
+ icon: heart

然后编辑:

1
2
3
文件位置:~/blog/themes/next/layout/_partials/footer.swig
- <span class="with-love">
+ <span class="with-love" id="heart">

接着编辑custom.styl,加入:

1
2
3
4
5
6
7
8
9
10
11
12
13
14
文件位置:~/blog/themes/next/source/css/_custom/custom.styl
// 自定义页脚跳动的心样式
@keyframes heartAnimate {
0%,100%{transform:scale(1);}
10%,30%{transform:scale(0.9);}
20%,40%,60%,80%{transform:scale(1.1);}
50%,70%{transform:scale(1.1);}
}
#heart {
animation: heartAnimate 1.33s ease-in-out infinite;
}
.with-love {
color: rgb(255, 113, 168);
}

color 的值可以改成你自己喜欢的,灵感来自 DIYgod 大佬的博客,CSS 代码参考 这篇文章

7. 拓展

8. 站点优化

8.1. 博文压缩

本着能偷懒则偷懒的原则,选择了使用hexo-neat插件,hexo-neat插件使用HTMLMinifier、clean-css、UglifyJS插件实现。

使用$ npm install hexo-neat --save安装完成以后,打开站点配置文件,添加以下属性。启用hexo-neat的基础上,可以选择是否压缩HTML、CSS、Js文件,均有相应的开关选项。

1
2
3
4
5
6
7
8
9
10
11
12
13
14
15
16
17
18
19
20
# hexo-neat

neat_enable: true

neat_html:
enable: true
exclude:

neat_css:
enable: true
exclude:
- '*.min.css'

neat_js:
enable: true
mangle: true
output:
compress:
exclude:
- '*.min.js'

8.4. 修改访问URL路径

默认情况下访问URL路径为:domain/2017/08/18/关于本站,修改为 domain/About/关于本站。 编辑 Hexo 站点下的 _config.yml 文件,修改其中的 permalink字段:

1
permalink: :category/:title/

给你的hexo站点添加sitemap网站地图

  1. 安装hexo的sitemap网站地图生成插件

    1
    2
    npm install hexo-generator-sitemap --save
    npm install hexo-generator-baidu-sitemap --save
  2. 在你的hexo站点的_config.yml添加下面的代码

    1
    2
    3
    4
    5
    # hexo sitemap网站地图
    sitemap:
    path: sitemap.xml
    baidusitemap:
    path: baidusitemap.xml
  3. 配置成功后,hexo编译时会在hexo站点根目录生成sitemap.xml和baidusitemap.xml
    其中sitemap.xml适合提交给谷歌搜素引擎,baidusitemap.xml适合提交百度搜索引擎。
    其次,在robots.txt中添加下面的一段代码:

    1
    2
    Sitemap: http://www.arao.me/sitemap.xml
    Sitemap: http://www.arao.me/baidusitemap.xml

请自行改成自己的网站。

给你的hexo网站添加蜘蛛协议robots.txt

可以参考我的robots.txt,代码如下

1
2
3
4
5
6
7
8
9
10
11
12
13
14
# hexo robots.txt
User-agent: *
Allow: /
Allow: /archives/

Disallow: /vendors/
Disallow: /js/
Disallow: /css/
Disallow: /fonts/
Disallow: /vendors/
Disallow: /fancybox/

Sitemap: http://www.arao.me/sitemap.xml
Sitemap: http://www.arao.me/baidusitemap.xml

把robots.txt放在你的hexo站点的source文件下即可。

给非友情链接的出站链接添加 “nofollow” 标签

经过chinaz站长工具友情链接检测,发现有不必要的PR值输出,对于非友情链接的PR值输出,我们可以加上nofollow便签避免不必要的PR输出。
araome友情链接检测结果'
以hexo的NexT主题为例,需要修改两处
a. 找到footer.swig,路径在your-hexo-site\themes\next\layout\_partials,将下面代码

1
{{ __('footer.powered', '<a class="theme-link" href="http://hexo.io">Hexo</a>') }}

改成

1
{{ __('footer.powered', '<a class="theme-link" href="http://hexo.io" rel="external nofollow">Hexo</a>') }}

将下面代码

1
<a class="theme-link" href="https://github.com/iissnan/hexo-theme-next">

改成

1
<a class="theme-link" href="https://github.com/iissnan/hexo-theme-next" rel="external nofollow">

b. 修改sidebar.swig文件,路径在your-hexo-site\themes\next\layout\_macro,将下面代码

1
<a href="{{ link }}" target="_blank">{{ name }}</a>

改成

1
<a href="{{ link }}" target="_blank" rel="external nofollow">{{ name }}</a>

将下面代码

1
<a href="http://creativecommons.org/licenses/{{ theme.creative_commons }}/4.0" class="cc-opacity" target="_blank">

改成

1
<a href="http://creativecommons.org/licenses/{{ theme.creative_commons }}/4.0" class="cc-opacity" target="_blank" rel="external nofollow">

完成效果(我的是新站,目前没友链):
araome友情链接检测结果没链接'

让你的关键字出现在title标题里

关键字出现在title标题里是有利于seo优化的,前提是你的目标关键词已经确定好。如果确定好的话,尽可能让它们在title标题尽量靠前,同时标题总字数注意控制在80个字符以内,切勿堆砌关键字。title的标点符号:关键词分割符号英文半角逗号,_ | ;品牌与关键词分割符号 -
具体实现方法参考hexo NexT主题首页title的优化

参考:

http://www.jianshu.com/p/3ff20be857

https://reuixiy.github.io/technology/computer/computer-aided-art/2017/06/09/hexo-next-optimization.html

https://zhuanlan.zhihu.com/p/30836436

http://blog.csdn.net/qq_33699981/article/details/72716951

http://blog.csdn.net/heqiangflytosky/article/details/54863185

http://blog.csdn.net/destinytaoer/article/details/78400023

hexo的next主题个性化教程:打造炫酷网站

看到有些next主题的网站很炫酷,那么是怎么配置的呢?接下来我会讲一讲如何实现一些炫酷的效果


-------------本文结束感谢您的阅读-------------
您的支持将鼓励我继续创作!